May 15, 2011

Transitions


Truthfully, Folly has been less engaging since the wallboard has gone up.  All the clever, thoughtful innovations that make the house airtight and solid are now hidden.  One cannot see the old wood reused as studs, the spaces carefully filled with insulation, the sealed air ducts, the wiring in conduit, etc.  Although no longer visible these elements create the calm, cool spaces which allow Folly to be so livable.

Thus far, the kitchen cabinets are either in place or awaiting the arrival of Mona Lisa.  Perhaps she’ll arrive on Tuesday (shall we have a toast?) 

Walls and woodwork have a first coat of paint, and the stone floor has been laid.  
These items are not inconsequential.  Getting them right has been very important.   Folly’s painter, Billy, has been diligent in seeking low/no VOC paint that actually covers the wall with out streaks.  At this point he has direct experience with the products of 3-4 paint companies.   As you can imagine, all this experimentation has been labor intensive as well as costly. The paints vary widely in cost – sometimes by as much as 2-3 times - which definitely impacts our budget.

The entire first floor is covered in shellstone. That means, every room, hallway, and closet. Such a large installation requires master craftsman.  The prep work itself takes some time.  Cleaning and leveling the floor and putting down crack suppressant sets up the condition for the real work to begin.  Establishing the pattern for each room and hallway (as well as the transitions between rooms) requires an easy familiarity with fractions as well as will a wet saw! As each small section of floor is set in place it is checked with a level to be certain that it is true - no dips or hills!

It’s accurate to say that the project is nearing completion, but there are still a number of systems to come on line.   There will be more updates in these final days.

December 13, 2010

Shooting The Pool

Believe it or not, the process of building a backyard swimming pool has its own special science and lingo. Of course, every weekend builder knows to begin with digging a hole. In this case, Folly’s pool will be 15 ft wide by 50 ft long, so it was beyond the scope of the shovel and wheelbarrow. It took some serious earthmoving equipment to dig the hole. These dimensions allow us to swim laps – both wonderful exercise and necessary therapy for arthritis. Perhaps it will also be the site for water aerobics for the local Golden Girls!

Building the pool takes six steps:
           
1. Once the hole is big enough, a wood form is built of the right dimension.
2. The form is lined with metal bars, both vertical and horizontal. At every point where a horizontal meets a vertical, a ring is inserted and fastened to hold that joint in place. You can imagine how many joints are required for a pool!
3. It’s a happy day when the day to “shoot the pool” arrives. The cement truck drives onto the site to great expectation because a big change will take place on this one day. The truck is NOT the kind one ordinarily sees rolling down the highway with a large drum turning to mix the cement as it travels from garage to worksite. Pool cement is quite different. The truck has two sections – both stationary. The larger section holds sand; the smaller holds cement. Both are drawn into a special hose equipped to add water to the dry material only at the last minute – at the nozzle. The result is that the cement sets in a much shorter time. 
4. It takes someone with considerable strength and skill to manage the pressurized hose.
5. The final step is to smooth the interior surface of the pool.
6. Admire the work.

Final painting and tile work waits until the pool deck is finished. Until then, Folly is one dream away from a swim-able pool.

November 2, 2010

Quandaries…….

Deciding to renovate a home brings all sorts of delicious quandaries. What to keep? What to demolish? Maybe keep something but use it in a new way? These questions have been asked and answered many times at the Folly.

One particularly prickly issue dealt with the installed stained glass windows and leaded glass windows. Family treasures? The result of a successful day of antiquing? The previous owner obviously loved them as they were very old before they were moved into the beach house. Since the colored glass, while beautiful, blocked the light, it was decided to sell all but one. A local antique dealer took a fancy to them. After buying and reframing them, they are now up for sale in her shop.  
The leaded glass panels seemed better suited to the house. Originally opposite the front door, they held pride of place. Everyone’s first impression became those panels. And although they limited the light that shined into the foyer, the patterns of metal bands afforded an interesting view to the garden. 
Oh, here is the delicious quandary: What to do? Keep the window in place and give up garden access from the foyer? Relocate the panels in the house? Sell the panels? There was a lively conversation of the “let’s do this, no, let’s do that” variety that lasted several weeks. Final decision: Separate the panel sections so that they can be used individually in some other part of the house. Install French doors to the garden for an open, modern feeling. Keep the old, but enliven the foyer with a light, bright introduction to the beautiful Florida landscape and ocean beyond. We have a plan…

A creative architect serves many functions. In this case, Matt was asked to solve our recycling problem by finding places for these leaded glass panels. His solution…let’s use them as the fronts for the doors of the storage cabinet we were building in the dining room. The piece will have lights to show the beauty of the glass (and the china behind). Larry, our multi talented, in house carpenter, loved the challenge. He built frames so that each panel serves as a single door. While not yet painted, it’s already obvious that this piece will be a distinctive feature of the dining room.  
Like the Chicago Brick fireplace reincarnated as an outdoor grill, Folly now has a new, more appropriate place for all the very old, still beautiful, leaded glass.

Don’t you love recycling?!

October 23, 2010

Learning Something New….

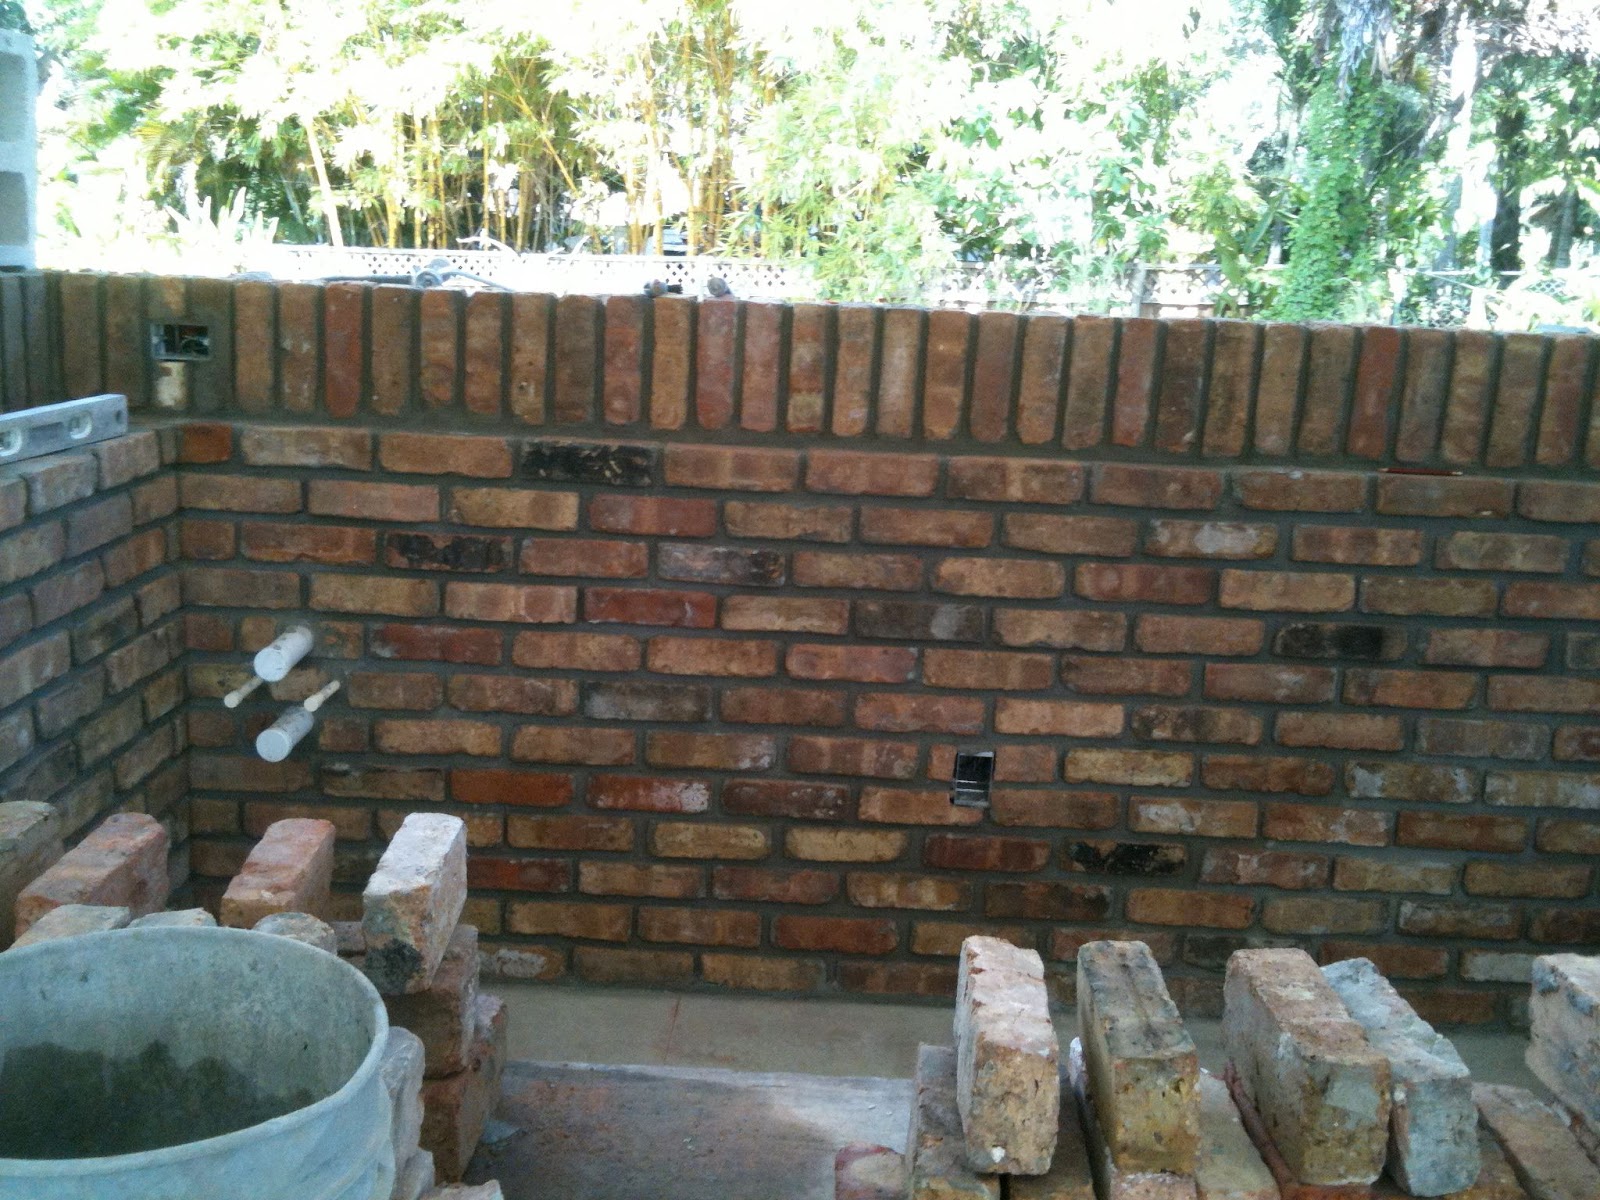
The skills needed to build a house continue to amaze me. For example, today the stonemason was laying up Chicago brick for the grill area. Sounds straightforward but it turned out to be more complicated than I had expected.

The old house had a large brick fireplace in the family room. Chicago brick is highly prized for its interesting character. Did you know that Chicago brick has been harvested from buildings in Chicago? For our green house it was readily available recycled material. So, when that room was removed, the fireplace bricks were saved. They were taken down and the mortar carefully chipped off each one individually. Then the bricks were arranged on wooden pallets in the garden. These particular bricks had been recycled from a building in Chicago to Folly’s original fireplace in Vero Beach. This new grill area is the third time these bricks have been used! 
Many of the bricks were damaged, chipped, bent, etc. so it took some time to cull through four pallets to find enough bricks for a wall!
Old Chicago brick contains a lot of air. It’s not apparent to the naked eye, but visible in its consequences. When the cement is applied, the brick draws the water out of mortar, causing an inadequate bond. In layman’s terms, the mortar dries too quickly, is not strong, giving the homeowner a weak structure which could fall down. Stonemasons, who know how to handle Chicago brick, soak the brick to let the air bubbles out. Gary, our stonemason, told me they bubble like seltzer.
Gary is a teacher at heart, so he set up an experiment for me. He set a wet brick next to a dry one and plopped mortar on each. The wet brick on the left is deeper in color having just emerged from its water bath. The mortar is equally moist on each brick.  
After just five minutes, the mortar on the right is already dark and hard. Gary tried to insert a pencil into it, but couldn’t. The cement was already set. The wet brick allowed the mortar to stay wet. The pencil stood on its own! This slower drying process will allow good, strong contact between the brick and the mortar.
A labor-intensive process, indeed, but the result is that the bricks have new life and Folly has a solid, beautiful and interesting wall.

September 30, 2010

Matt's Corner

Like most creative endeavors, architecture is about solving problems. Adding a second story to Folly presented an interesting issue for Matt Gore, our architect, since the square footage was bigger than optimum. Watch Matt explain how he solved the problem which we call "Matt's corner."


September 28, 2010

A Momentous Day for Folly

The past weeks have seen dramatic and wonderful changes at the Folly.  Not only is there wallboard on all the walls throughout the house, but the interior has been primed for final painting. But…but, one needs to look up to see the most telling changes. The photovoltaic (PV) panels have been installed on the roof and Folly is generating electricity!!

Like most complex projects, this was done in stages. The cement roofing tiles were delivered and set in place on the roof sections facing north and west, that is, on those areas that would not have PV panels. Then the PV panels were delivered to the site.
A feature of this project which excites me is that the opportunity to teach local tradesman how to work with new technology. So on installation day, Folly was really a classroom, a hands-on project for the electricians and roofers. Manny, the rep of the company that makes the PV panels, was their teacher. This system is called Building Integrated Photo Voltaic (BIPV) and has many benefits for the homeowner. The panels are flat to the roof (rather than being raised above the roof) and blend into the roofline so that they are nearly invisible from the ground. They are slightly different in size in that each PV panel is as long as four cement tiles. In addition, Folly’s roof tiles are dark grey to match the PV as closely as possible.
There was some discussion as to the best installation method. After all, any house in a hurricane zone runs the risk of having a 140 mph breeze blow roof tiles up and sailing across the landscape. That is not a good neighbor policy. In the end, the most conservative option was used (here it’s called the “belt and suspenders”). The PV panels are held down by 1) a band of tar, 2) four lines of foam “glue” and 3) two screws.
The electricians found that this was not as technically challenging as they had expected. These panels are connected in short series (like strings of Christmas lights) before connecting to the main line. A lot of time was spent in checking that each panel could produce power and then that the entire line was “hot”. Very careful work. Fortunately, the cloudy sky that day made working conditions comfortable on the roof, and, surprisingly, even in that less-than-optimal state the panels produced electricity.
The final step is to install inverters that will make Folly’s solar generated power available to our electric company and usable for our appliances. PV panels produce direct current while we in the USA use alternating current. When the inverters are installed next week we can watch the electric meter spin backwards as we sell electricity to the grid!

All in all it was a momentous day for Folly! Please check out the video for a closer look.


September 2, 2010

On Our Way To LEED Certification

Making a decision to do one thing can have interesting unintended consequences. When Folly was put on the path to becoming the first LEED certified residence in our area, I thought the process would be one of meeting requirements for energy and water use demonstrated by filling out forms to be sent to an accrediting body faraway. The process turned out to be not so simple. Our way to LEED certification will run through a series of tests by third party Raters to assure that Folly is indeed, in fact, energy and water efficient. The first of these occurred this week.

Susan Brown of Brownstone’s Energy Services arrived to do a Thermal Bypass Checklist and the Blower test for the air conditioning system. Her equipment consists of deep knowledge of the thermal properties of different materials, a practiced eye in spotting gaps in the building envelope, and a blower device and flexible hoses that send a fog like substance through the a/c system.

Since this was being done before the drywall has been installed, Susan was able to move systematically room by room examining the insulation and other materials. Icenyne foam has been sprayed in the attic and on the walls of the building. This gives a high R value and places all the a/c ductwork in air conditioned space. In thermal barrier terms, i.e. keeping the hot, humid air out of the building, this is great. I did not realize that wood was not as good a thermal barrier. Since wood had been used under the windows to insure a snug fit, some additional insulation has to be installed (the building has 2 x 6 studs, so Susan suggested that next time, we use 2 x 4s to fill the gap under the window and apply 2 inches of insulation over that). Any small gaps spotted during the inspection were filled immediately with foam but the larger spaces require a mechanic to return to the sight. 

Windows and doors at the Folly are by Kolbe – aluminum clad wood frames with insulated, low e glass. They allow a lot of natural light though but with very little heat gain. Since we are in coastal Florida it is also important that they be hurricane resistant and load tested to 140 mph winds.

Folly has three a/c systems since some sections of the house are likely to be used more than others. The most used areas have a larger separate system. Before Susan’s arrival, all the grills had been sealed and the ducts checked for leaks as best as possible. At the air intake for each system, Susan set up her blower. A 4-inch section of the grill farthest away from the air intake was uncovered. Then Susan started up her machine and we all held our breath. We scanned the line of the ductwork to spot smoke coming out. Nothing. After about 5 minutes smoke started pouring out of that distant grill followed by a general joyous shout. We have an airtight system! Each of the three systems was checked in this way with the same result. This is a credit to our a/c installer, Manuel from Barker Air Conditioning.  Susan told us that this rarely happens as there are often places along the length of ducts that have small leaks. Everyone here feels good about a job well done! Susan did suggest that in places were unlike materials meet, e.g. where a flexible hose meets an aluminum housing, that Manuel seal the joints with mastic. This seal is less likely to fail in our hot, humid climate.

Although this was a “test”, everyone involved – architect, contractor, LEED consultant and homeowner – felt it was a productive and worthwhile session. Folly passed her tests with flying colors.