Showing posts with label The Process. Show all posts

December 13, 2010

Shooting The Pool

Believe it or not, the process of building a backyard swimming pool has its own special science and lingo. Of course, every weekend builder knows to begin with digging a hole. In this case, Folly’s pool will be 15 ft wide by 50 ft long, so it was beyond the scope of the shovel and wheelbarrow. It took some serious earthmoving equipment to dig the hole. These dimensions allow us to swim laps – both wonderful exercise and necessary therapy for arthritis. Perhaps it will also be the site for water aerobics for the local Golden Girls!

Building the pool takes six steps:
           
1. Once the hole is big enough, a wood form is built of the right dimension.
2. The form is lined with metal bars, both vertical and horizontal. At every point where a horizontal meets a vertical, a ring is inserted and fastened to hold that joint in place. You can imagine how many joints are required for a pool!
3. It’s a happy day when the day to “shoot the pool” arrives. The cement truck drives onto the site to great expectation because a big change will take place on this one day. The truck is NOT the kind one ordinarily sees rolling down the highway with a large drum turning to mix the cement as it travels from garage to worksite. Pool cement is quite different. The truck has two sections – both stationary. The larger section holds sand; the smaller holds cement. Both are drawn into a special hose equipped to add water to the dry material only at the last minute – at the nozzle. The result is that the cement sets in a much shorter time. 
4. It takes someone with considerable strength and skill to manage the pressurized hose.
5. The final step is to smooth the interior surface of the pool.
6. Admire the work.

Final painting and tile work waits until the pool deck is finished. Until then, Folly is one dream away from a swim-able pool.

October 23, 2010

Learning Something New….

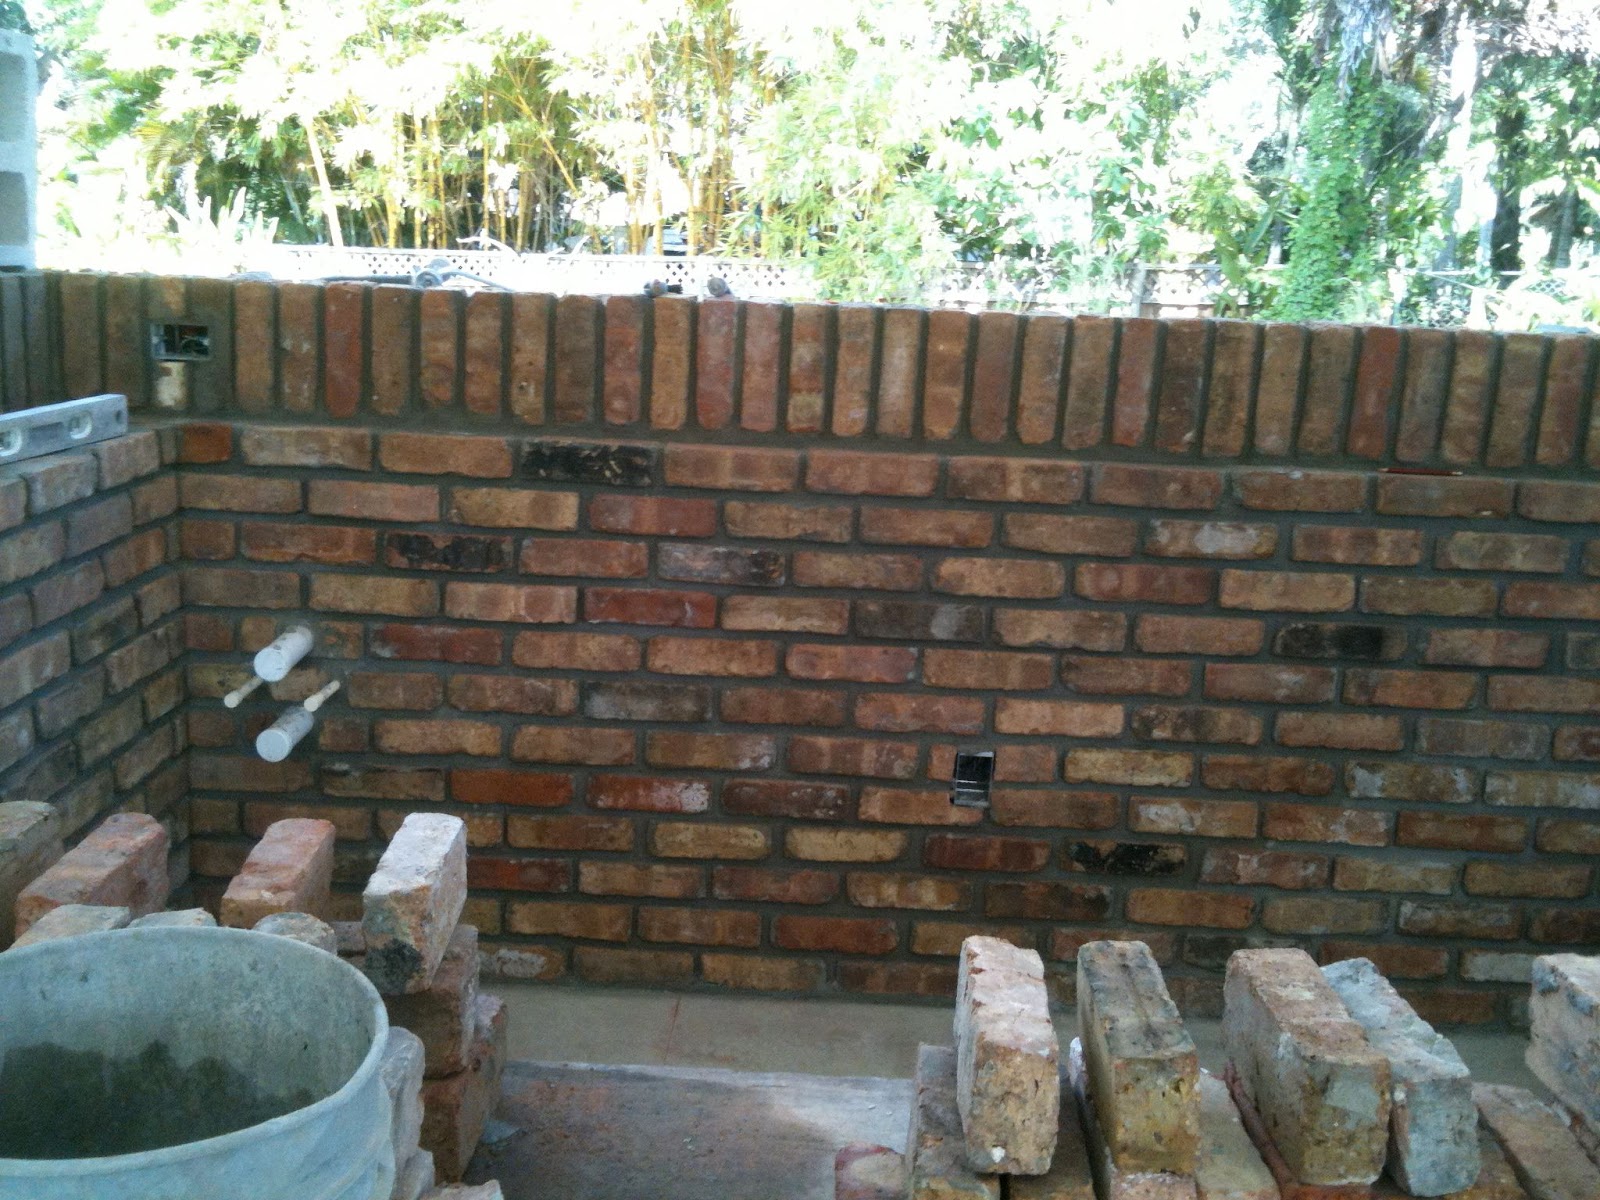
The skills needed to build a house continue to amaze me. For example, today the stonemason was laying up Chicago brick for the grill area. Sounds straightforward but it turned out to be more complicated than I had expected.

The old house had a large brick fireplace in the family room. Chicago brick is highly prized for its interesting character. Did you know that Chicago brick has been harvested from buildings in Chicago? For our green house it was readily available recycled material. So, when that room was removed, the fireplace bricks were saved. They were taken down and the mortar carefully chipped off each one individually. Then the bricks were arranged on wooden pallets in the garden. These particular bricks had been recycled from a building in Chicago to Folly’s original fireplace in Vero Beach. This new grill area is the third time these bricks have been used! 
Many of the bricks were damaged, chipped, bent, etc. so it took some time to cull through four pallets to find enough bricks for a wall!
Old Chicago brick contains a lot of air. It’s not apparent to the naked eye, but visible in its consequences. When the cement is applied, the brick draws the water out of mortar, causing an inadequate bond. In layman’s terms, the mortar dries too quickly, is not strong, giving the homeowner a weak structure which could fall down. Stonemasons, who know how to handle Chicago brick, soak the brick to let the air bubbles out. Gary, our stonemason, told me they bubble like seltzer.
Gary is a teacher at heart, so he set up an experiment for me. He set a wet brick next to a dry one and plopped mortar on each. The wet brick on the left is deeper in color having just emerged from its water bath. The mortar is equally moist on each brick.  
After just five minutes, the mortar on the right is already dark and hard. Gary tried to insert a pencil into it, but couldn’t. The cement was already set. The wet brick allowed the mortar to stay wet. The pencil stood on its own! This slower drying process will allow good, strong contact between the brick and the mortar.
A labor-intensive process, indeed, but the result is that the bricks have new life and Folly has a solid, beautiful and interesting wall.

September 30, 2010

Matt's Corner

Like most creative endeavors, architecture is about solving problems. Adding a second story to Folly presented an interesting issue for Matt Gore, our architect, since the square footage was bigger than optimum. Watch Matt explain how he solved the problem which we call "Matt's corner."


September 2, 2010

On Our Way To LEED Certification

Making a decision to do one thing can have interesting unintended consequences. When Folly was put on the path to becoming the first LEED certified residence in our area, I thought the process would be one of meeting requirements for energy and water use demonstrated by filling out forms to be sent to an accrediting body faraway. The process turned out to be not so simple. Our way to LEED certification will run through a series of tests by third party Raters to assure that Folly is indeed, in fact, energy and water efficient. The first of these occurred this week.

Susan Brown of Brownstone’s Energy Services arrived to do a Thermal Bypass Checklist and the Blower test for the air conditioning system. Her equipment consists of deep knowledge of the thermal properties of different materials, a practiced eye in spotting gaps in the building envelope, and a blower device and flexible hoses that send a fog like substance through the a/c system.

Since this was being done before the drywall has been installed, Susan was able to move systematically room by room examining the insulation and other materials. Icenyne foam has been sprayed in the attic and on the walls of the building. This gives a high R value and places all the a/c ductwork in air conditioned space. In thermal barrier terms, i.e. keeping the hot, humid air out of the building, this is great. I did not realize that wood was not as good a thermal barrier. Since wood had been used under the windows to insure a snug fit, some additional insulation has to be installed (the building has 2 x 6 studs, so Susan suggested that next time, we use 2 x 4s to fill the gap under the window and apply 2 inches of insulation over that). Any small gaps spotted during the inspection were filled immediately with foam but the larger spaces require a mechanic to return to the sight. 

Windows and doors at the Folly are by Kolbe – aluminum clad wood frames with insulated, low e glass. They allow a lot of natural light though but with very little heat gain. Since we are in coastal Florida it is also important that they be hurricane resistant and load tested to 140 mph winds.

Folly has three a/c systems since some sections of the house are likely to be used more than others. The most used areas have a larger separate system. Before Susan’s arrival, all the grills had been sealed and the ducts checked for leaks as best as possible. At the air intake for each system, Susan set up her blower. A 4-inch section of the grill farthest away from the air intake was uncovered. Then Susan started up her machine and we all held our breath. We scanned the line of the ductwork to spot smoke coming out. Nothing. After about 5 minutes smoke started pouring out of that distant grill followed by a general joyous shout. We have an airtight system! Each of the three systems was checked in this way with the same result. This is a credit to our a/c installer, Manuel from Barker Air Conditioning.  Susan told us that this rarely happens as there are often places along the length of ducts that have small leaks. Everyone here feels good about a job well done! Susan did suggest that in places were unlike materials meet, e.g. where a flexible hose meets an aluminum housing, that Manuel seal the joints with mastic. This seal is less likely to fail in our hot, humid climate.

Although this was a “test”, everyone involved – architect, contractor, LEED consultant and homeowner – felt it was a productive and worthwhile session. Folly passed her tests with flying colors. 

August 24, 2010

Options for Photovoltaics

When we began this journey, we set upon a road to produce enough power to run a modern home – no excuses. It does not make sense to promote a new way of building that provides fewer amenities or that looks like an industrial building plopped in a residential neighborhood. The Folly has lights – indoors and out, ceiling fans, a whole house fan (this is Florida, after all!), air conditioning (again, a nod to our location), refrigerator, an induction cooktop, dishwasher, and washers and dryers. All these features run on electricity. According to Matt Gore, the architect on the project, about 12 KW will be more than sufficient. 

After we’ve done all we could to seal the envelope, provide air flow, and reduce consumption via the use of LED light bulbs and heat recovery pumps, we still have a big draw – air conditioning is energy intensive. How can we accomplish this? While other sections of the country can use geothermal or wind energy, the most available power source in this part of Florida is the sun. At the moment, the options for generating solar power are:
We looked at all three.

There are differences in costs and aesthetics. The standing seam metal roof looks appropriate in this beachside community. Either the mounted panels or the thin film works with such a roof. Since I objected to the “look” of a dozen or so panels mounted on my roof, we took a look at the thin film. This is an elegant system where the photovoltaics are glued between the seams and the hot water heating system runs under the metal roof. Very neat. The film is most efficient when in lengths of over nine feet. Unfortunately, the Folly has enough south facing sections that measure over nine feet to produce only 3.5 KW. We had already decided that we needed more than that. So this option was set aside.

The two remaining options were PV panels mounted on a metal roof and a tile roof with embedded PV. My aesthetic preference was for the tile but I wasn’t willing to ignore costs. As it turned out, the mounted panel system that produced 12 KW cost 15% more than the tile integrated panels. A happy day! The more pleasing option cost less!!! I could please both my eye and my bank account!

August 14, 2010

Will Mona Lisa make the trip from Melbourne to Vero Beach?

Blogsters may remember my expedition to Stone and Surface in Melbourne to look for a top for the kitchen island. At four feet wide by ten and a half feet long the island is to be the centerpiece of the heart of the house, the kitchen/family room. Like others, my Italian family loves being together and often gathers to cook, to eat, to talk. Over the years, I’ve enjoyed having friends come together in the same way. My vision for this room is that it will become “conversation central.”

With this idea in mind, my friend, Cris, and I searched the isles of marble, granite and quartzite until we spied an astonishingly stunning piece of quartzite named Mona Lisa. Warned that the piece was “expensive”, we left certain that we’d found what we were looking for, but uncertain whether we’d ever have it. So now we have the rest of the story…

The dimensions and price of the stone (72 inches by 135 inches) were sent to two fabricators in Vero Beach. I waited for a call on Friday----nothing. It was a long weekend spent wondering. Questions danced around my head…

“Exactly how much could this cost?”

“If it costs a lot, could I afford it? Could I cut something else in the budget?”

“In the end, will I be truly delighted to live with Mona Lisa? Will she still delight me in five years?”

On Monday, I received the first bid.  

Ouch!

On Tuesday, I received the second bid.

Ouch! But better.

Decision time – almost. Never one to decide too quickly, I made one more trip to Melbourne, this time with my decorator, Betty Manry. Certain that I knew where the stone was located, we walked into the yard – no Mona Lisa!

A new shipment had arrived and four slabs of granite had been placed in front of Mona Lisa. She wasn’t the new girl on the block anymore.

We asked the salesman if we could see our slab.

“Sure, but you have to wait until we move the others. It will take only 15 minutes.” This maneuver is done by using a large tractor equipped with a crane and heavy rubber pads that can grab the slab at the top and move it to the side, down the aisle, etc. We waited.

Finally, the time had come. We looked at the stone. Same reaction.  

YES! The opportunity to walk in to my kitchen and smile at this stone on a daily basis is too good to pass up! Mona Lisa and I will be together for a long, long time!

July 27, 2010

Granite, Marble or Quartzite?

Wandering around Stone and Surface in Melbourne, I’m amazed by the hundreds of outstandingly beautiful slabs of granite, marble and quartzite. I’m here with my friend Chris to choose something for a kitchen island. This is to be a largish island, 48 in by 126 in. No seams, please, so it needs to be a very large stone.* After checking her computer, Sylvia identifies seven suitably sized pieces, we sign a liability waiver, and go into the yard. Some stones are boring, some too light, some too dark. But they have very intriguing names. There’s “Absolute Black” – a honed, non-shiny granite. Dark, dark, so dark it won’t show the inevitable crumbs. There’s “Costa Esmerelda” – sea green with waves of sandy ripples. Verde Uba Tuba, River Storm, Rosso Fiorentino, Madreperola…(who thinks of these names? Why not me? Wouldn’t it be fun to be paid for dreaming up enticing names for beautiful stone?)

But, finally, we come upon a piece of quartzite called “Mona Lisa” that catches my eye. It is stunning. Chris is beside herself enjoying the color, the layers, the swirls!! All the colors of the earth in striations and then waves. This could be the centerpiece of the kitchen/family room, I’m sure.

One problem, they won’t tell me the price. Can I afford it?

Sylvia says, “it’s expensive.”

“Can you give me a ball park figure – just something general, plus or minus a bit? Is it a thousand? Two thousand?”

“Well, no,” she smiles as she tells me, “I cannot break our procedure. We only give the prices to the fabricator. What is the name of the company who will make the island?”

So I hand over the name of the local fabricator and go home convinced that the countertop will cost more than all the cupboards in the kitchen plus the cabinets in the bathrooms added together.

The next morning, Chris calls to learn the price. I call the fabricator. Dave says, “we really need the architect’s drawing.”

Argh!!!

I take a copy of the kitchen design to the factory. The next day, no call comes. The weekend is here; no call. Still no idea how much this potentially eye catching focal point of the kitchen will cost.

Mona Lisa, Mona Lisa, will you be the centerpiece of the most important room of the house, or the one that got away?

*Some readers might wonder why I’m looking at stone instead of recycled tile, concrete or another “green” option. Truthfully, these surfaces do not appeal to me aesthetically. My goal was to have a home that is not only “green” in the sense that it meet a high LEED standard, but also is truly an exquisitely beautiful environment. One that makes me smile as I enter. Concrete countertops do not make me smile.

July 19, 2010

Video Update

It's July and the house renovation is in full swing. You can hear the hammers and saws! Here's a peek at how it looks now.

July 18, 2010

Back to Basics

A homeowner who has made the decision to use sunlight to power his home has several choices, since no “standard” or “best practice” has been established as yet. Cost, preferred roofing material, aesthetic appeal, and the availability of rebates are often the drivers of choice.

Here are the current options for generating electricity from the sun:


Solar Panels: Seen on rooftops since the 1970’s, the number of panels depends on the desired kW produced. Roof mounted panel sizes vary with the application; the active ingredient is silicon; the housing is metal (usually aluminum); the panels are attached to the roof using metal braces and clips. http://www.youtube.com/watch?v=Dr6UEtngtdU

Thin film solar panels are flexible panels that are glued to the roofing material. They are thinner and lighter, but slightly less efficient, than the standard panels.

http://www.youtube.com/watch?v=YYJe12X6T50

Building Integrated Photo Voltaics (BIPV) are photovoltaic materials that are used to replace conventional building materials in parts of the building envelope such as the roof, skylights, or facades. For a homeowner, there are solar electric roofing tiles ( or shingles ) or cells imbedded in cement tiles. The tiles do not change the profile of the roof and appear almost exactly like the rest of the roof (they do have a slight shine and are dark, so would be more obvious against a light colored tile). Other BIPV options are solar awnings which serve the double functions of generating electricity and providing shade. Check out the website of 4 Times Square, New York City to see an impressive commercial use of BIPV.
http://www.iea-pvps.org/cases/usa_01.htm
--or for a more general presentation: http://www.ornl.gov/sci/solarsummit/presentations/ORNL-Coonen/pdf

Once installed how does the homeowner use the solar generated power?

The system can be tied to the electric grid, so that it is added to the regular source of electricity for the home. Many Utility companies track any electricity produced, give the homeowner a credit against the power bill or mail them a check for the excess.

System tied to the grid but with battery backup to capture excess production for use when sunlight is low.

Off grid, independent solar electricity systems use solar collectors plus a backup generator.

References:
http://www.thesolarguide.com/solar-power-uses/cost-faq.aspx
http://en.wikipedia.org/wiki/Solar_cell

July 13, 2010

Decisions! Decisions!!!!! So Many Decisions!!!!!!

Have you ever tried to quantify the number of decisions required in building or renovating a house? I will try to do that for just one room - the master bath. This should be relatively simple and straightforward, eh? We'll see....

Decide: What overall look do you want?

Subtotal: Master Bath (1)
 
  • What color do you want on the floor?
  • What kind of flooring? Wood? Tile? Marble? Cork?
  • What size pieces for the floor? 18 x 18 in tile? Uneven boards?
  • What pattern for the floor?
  • All the same or not, e.g. large format tile with small patterned border?
Subtotal: Master Bath (6)
  • What kind of commode?
  • Two piece or one piece?
  • Dual flush? Single flush?
  • How many gallons per flush?
  • How high do you want the seat?
  • Seat should be oval or elongated?
  • Design should be modern/traditional/transitional?
  • Color?
  • Do you want a privacy wall?
  • Will you install grab bars against a future infirmity?
Subtotal: Master Bath (16)
  • How many sinks? One or two?
  • What shape sink – oval, round, square?
  • What color?
  • Free standing or in a cabinet?
  • If a cabinet, what style? What finish? What kind of hardware?
  • If in a cabinet, will the sink will be self rimming or undermount?
  • Will it have a single hole faucet?
  • If not, will the faucets be wide spread or narrow spread?
  • What style will the faucets be?
  • What finish will the faucets have – brushed chrome, bright chrome, etc?
Subtotal: Master Bath (28)
  • Will you have a bathtub?
  • Free standing or encased?
  • Acrylic or cast iron?
  • What shape?
  • What length?
  • What width?
  • What color?
  • What kind of faucet?
  • Wall mounted?
  • Standing on floor?
Subtotal: Master Bath (38)
  • Will you have a shower?
  • What size will it be?
  • What material will be on the walls and floor – tile, marble, silestone, etc?
  • Will that material be on both walls and floor?
  • Same size or different size?
  • Will the material go to the ceiling?
  • Will the shower have a shelf? A niche? A seat?
  • What kind of hardware? A stationary shower head? Hand held shower? A bar for the shower head?
  • Soap dish?
  • Will the door be glass? With a frame or frameless?
  • Put in a grab bar against future infirmity?
Subtotal: Master Bath (49)
  • What kind of mirrors?
  • Separate mirrors over sink or one large mirror?
  • Framed or frameless?
Subtotal: Master Bath (52)
  • What kind of lights? Twin lights beside mirrors? Strip light above mirror?
  • Ceiling fixture: Light near tub? Light in shower?
Subtotal: Master Bath (58)
  • What will be on walls? Paint? Flat? Special finish? Paper?
  • Will there be artwork?
  • What kind?
Grand Total: Master Bath (64)

So the final number seems to be 64 decision points in putting together one bathroom. Choosing each item takes time for research into availability, quality, and price. So take pity on the homeowner who takes on a renovation – her brain is swimming with details about materials, colors, design elements, environmental requirements, etc, etc.

And, in this case, the Folly has 4 full baths and a powder room! Yikes!

February 3, 2010

Demolition


This renovation involves making the house smaller -- by 1200 sq ft. Specifically it means removing a master bedroom suite and part of the family room. Today the demolition began! The difficulty lay in trying to preserve the 6" x 12" x 15 ft ceiling beams so that they could be reused in the new construction. To begin, some brush was removed to widen the road. Next, Mike Saski the operator of the backhoe, placed the back of the bucket very gingerly between two beams and gently lifted the roof. When that part was lifted a little, he moved his machine to the section between the next two beams. And so on. Gradually, the whole roof was lifted enough so that the claw could take the material away. Next the sides of the building were removed. By the end of Day one, the Master Bedroom and Bath were gone!!